
Mastering Bottom Round Roast: The Ultimate Guide to Perfect Results Every Time
Table of Contents
Are you tired of tough, disappointing roast beef that wastes both your time and money? Transform an affordable bottom round roast into a restaurant-quality meal with our expertly tested method. While many home cooks struggle with this lean cut, our professional technique delivers consistently tender results at a fraction of the cost of premium cuts. Whether you’re an experienced chef or a kitchen novice, this comprehensive guide combines time-honored butcher wisdom with modern culinary science to help you achieve exceptional results. By following our precise methodology, you’ll master the art of preparing bottom round roast and create memorable dining experiences that belie the modest cost of this versatile cut.
Quick Reference Guide
Total Time: 2.5-3 hours
- Preparation: 15 minutes
- Temperature equilibration: 60-90 minutes
- Cooking: 25-30 minutes per pound
- Resting: 15-20 minutes
Key Temperature Targets:
- Rare: 125°F (52°C)
- Medium-rare: 135°F (57°C)
- Medium: 145°F (63°C)
- Medium-well: 150°F (66°C)
Cost-Saving Tips:
- Purchase when on sale and freeze for up to 6 months
- Buy larger cuts and portion yourself
- Compare prices between local butchers and supermarkets
- Look for “family pack” discounts
Understanding Your Bottom Round Roast Recipe
Bottom round roast comes from the rear leg of the cow, specifically the exterior muscle of the upper leg. This anatomical position results in a lean, dense cut that requires precise cooking techniques to achieve optimal tenderness. The cut typically ranges from 2.5 to 4 pounds and presents several notable attributes:
- Minimal intramuscular fat content
- High-density muscle fiber composition
- Superior protein concentration
- Cost-effective investment compared to premium cuts
- Adaptability to various preparation methods
Essential Preparation Steps
Success begins with meticulous attention to preliminary steps. First, remove your roast from refrigeration 60-90 minutes prior to cooking. This critical step ensures thermal uniformity throughout the cut. Position the meat on a sanitized surface, loosely covered with aluminum foil, allowing it to achieve ambient temperature.
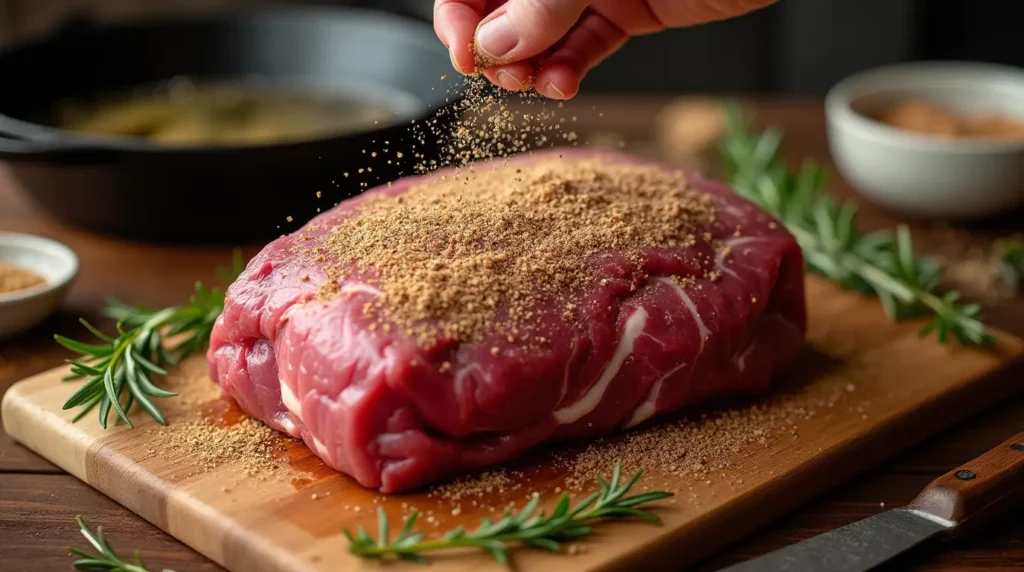
During this temperature equilibration period, prepare your seasoning mixture:
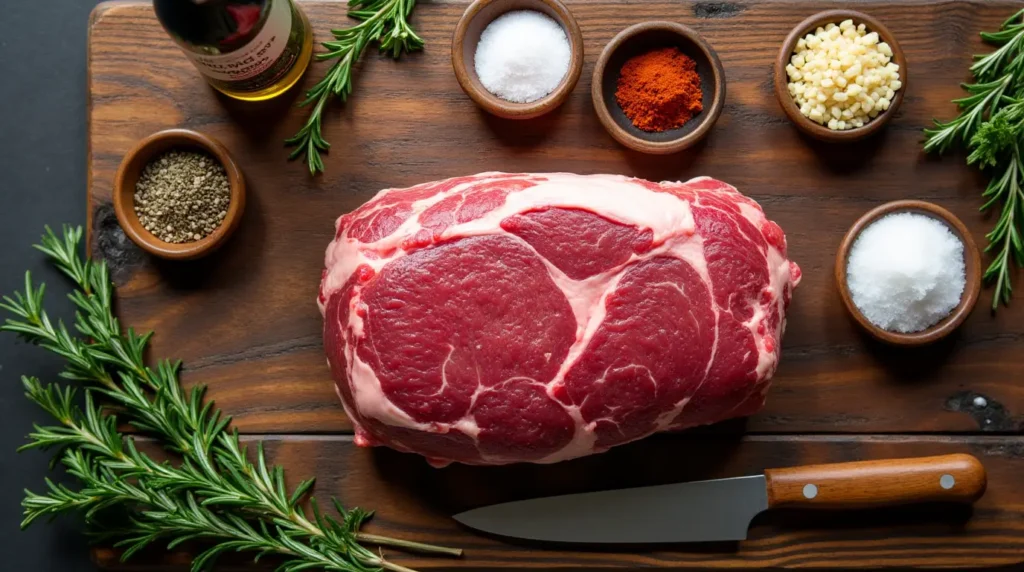
- 2 tablespoons kosher salt
- 1 tablespoon freshly ground black pepper
- 2 teaspoons granulated garlic
- 2 teaspoons dried thyme
- 1 teaspoon granulated onion
- 1 teaspoon paprika
Thoroughly combine these elements and apply generously to all surfaces of the roast. The salt component facilitates muscle fiber breakdown and enhances flavor penetration.
Professional Cooking Method
Required Equipment:
- Cast-iron skillet or heavy-gauge roasting vessel
- Calibrated meat thermometer
- Professional-grade kitchen twine (optional)
- Heavy-duty aluminum foil
- Elevated roasting rack
Step-by-Step Instructions:
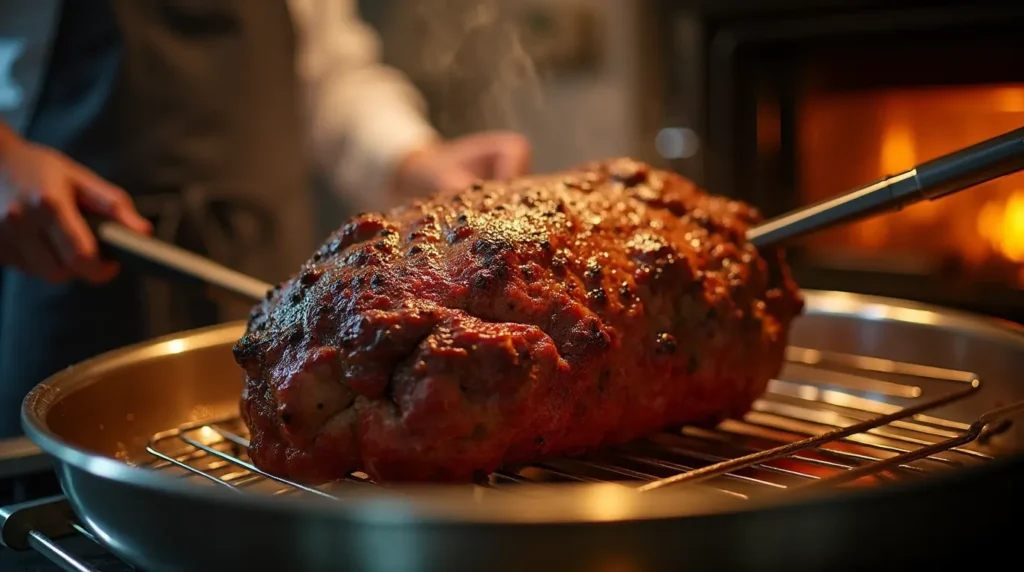
- Preheat your oven to 375°F (190°C).
- Heat 2 tablespoons of high-smoke-point oil (preferably avocado or grapeseed) in your selected vessel until it reaches proper temperature, indicated by slight shimmer.
- Execute a thorough sear on all surfaces until optimal browning is achieved, approximately 3-4 minutes per side. This process develops complex flavor compounds through the Maillard reaction.
- Transfer to an elevated roasting rack positioned within a roasting vessel.
- Insert a calibrated meat thermometer into the thickest section, avoiding fat deposits or bone.
- Place in preheated oven and reduce temperature to 325°F (165°C).
- Monitor internal temperature until reaching your desired doneness (refer to temperature guide above).
The Critical Resting Period
Upon removal from the oven:
- Create a loose tent configuration with aluminum foil
- Maintain resting period for minimum 15-20 minutes
- Account for 5-10 degree temperature elevation during this period
- Allow proper protein restructuring and moisture redistribution
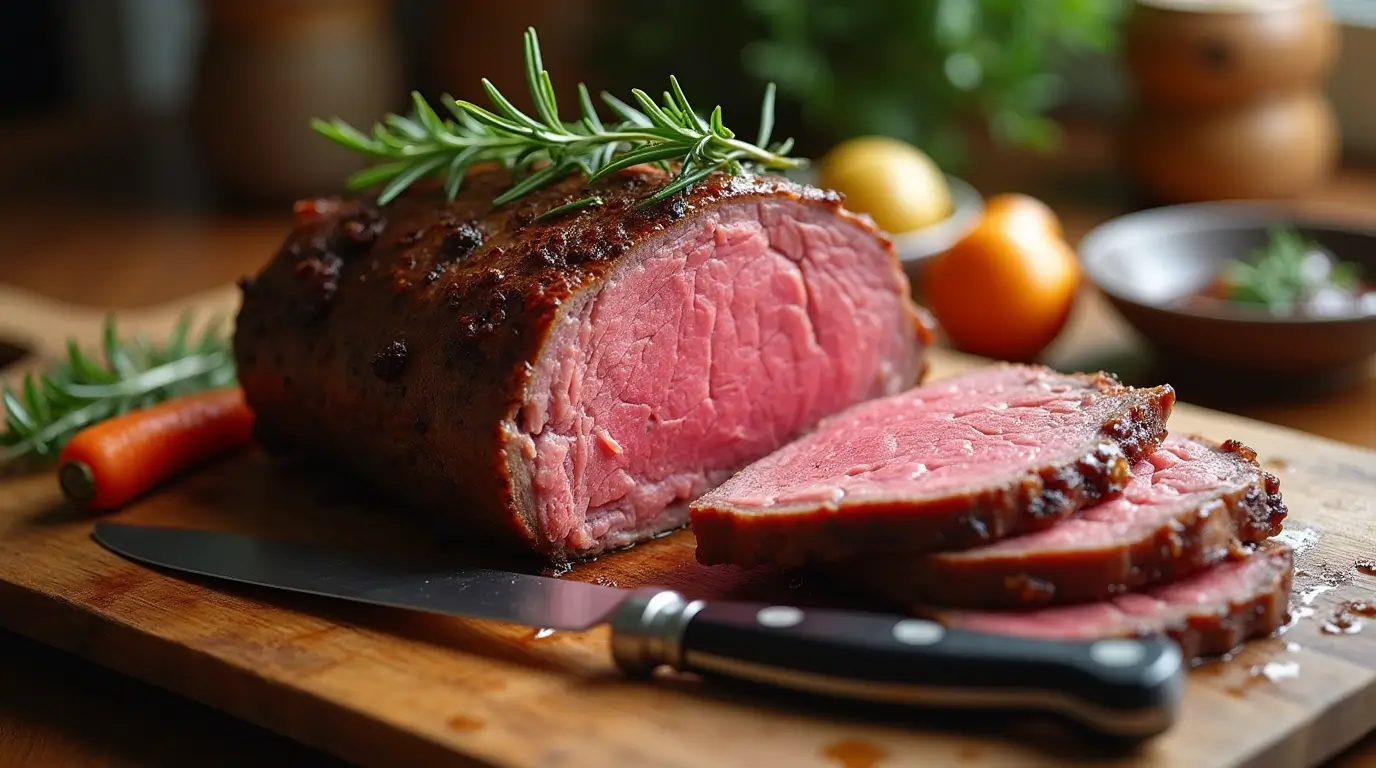
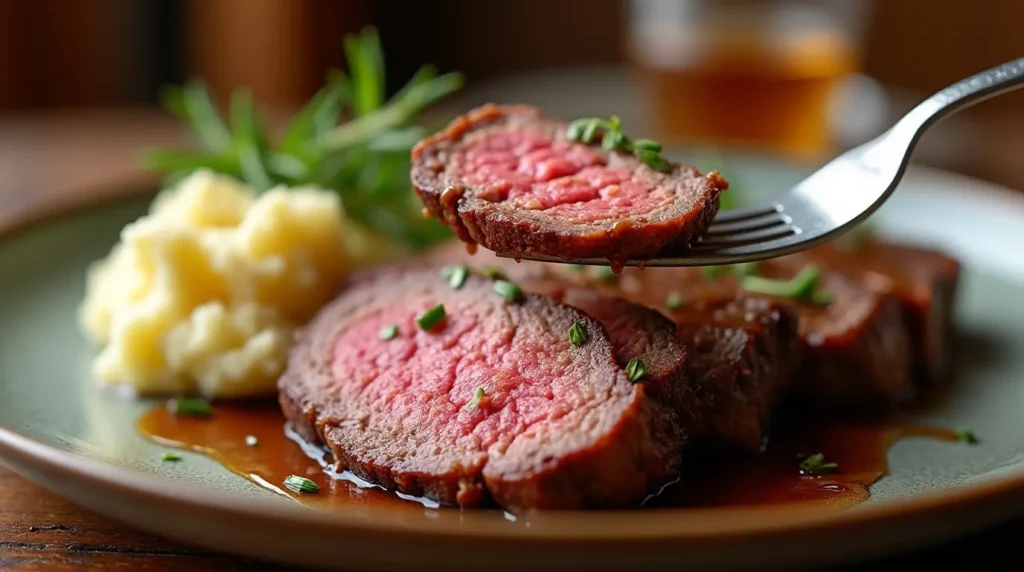
Professional Slicing Technique
The way you slice your roast significantly impacts both presentation and texture:
- Identify muscle fiber orientation
- Position cutting implement perpendicular to fiber direction
- Utilize a properly sharpened carving knife
- Maintain consistent slice thickness of approximately ¼ inch
- Execute uniform cuts for professional presentation
Seasonal Preparation Variations
Summer Preparation
- Incorporate fresh herbs like basil and oregano
- Consider cooking on a covered grill for smoky flavor
- Serve with lighter, seasonal vegetables
- Excellent for cold roast beef sandwiches
Winter Preparation
- Use heartier herbs like rosemary and thyme
- Add root vegetables to the roasting pan
- Perfect for Sunday roast dinners
- Ideal for hot roast beef sandwiches
Professional Storage Protocol
Implement proper storage procedures to maintain quality and safety standards:
- Initiate refrigeration within two hours of service
- Utilize airtight storage containers
- Maintain freshness for 3-4 days maximum
- Freeze for up to 3 months if necessary
Secondary Uses:
- Thinly sliced for professional sandwiches
- Diced for classic beef preparation
- Incorporated into composed salads
- Utilized in Asian-inspired preparations
Frequently Asked Questions
What’s the most common mistake people make with bottom round roast?
The most frequent error is overcooking. Unlike well-marbled cuts, bottom round roast becomes increasingly tough when cooked beyond medium. Always use a meat thermometer and aim for medium-rare to medium for optimal tenderness.
Can I prepare a bottom round roast from a frozen state?
While possible, preparing a frozen bottom round roast is not recommended from a culinary perspective. The frozen state prevents proper searing, which is essential for developing complex flavor compounds. Additionally, frozen protein cooks unevenly, compromising temperature control. Professional practice recommends thawing in refrigeration for 24-48 hours before preparation.
What modifications are necessary for slow-cooker preparation?
For slow-cooker adaptation, execute the initial searing protocol as specified, then transfer to the slow-cooker apparatus. Add 240ml beef stock, aromatic vegetables, and root vegetables as desired. Process on low setting for 8-10 hours or high setting for 5-6 hours, maintaining minimum internal temperature requirements.
How can I maximize leftovers from my bottom round roast?
Plan for multiple meals by slightly undercooking the center of larger roasts. The ends will be more done for those who prefer it, while the center remains rare to medium-rare. Refrigerate the rarer portions immediately after dinner and slice thinly for sandwiches, salads, or quick stir-fries later in the week.
What distinguishes bottom round roast from rump roast?
While both cuts originate from the posterior section of the bovine, bottom round roast is harvested from the exterior muscle of the upper leg, while rump roast originates from the immediately superior section. Bottom round presents a leaner profile and superior slicing characteristics, while rump roast contains slightly more intramuscular fat and is often preferred for braising applications.
Conclusion
The art of preparing bottom round roast combines precision, patience, and proper technique. This economical cut rewards careful preparation with exceptional results that will impress both family and guests. By following these detailed protocols and recommendations, you’ll consistently achieve professional-quality results while maintaining budget consciousness. Remember that mastery comes through practice, and don’t hesitate to adjust these parameters to suit your specific equipment and preferences.
Note: Prices and availability may vary by region and season. Always consult your local butcher for specific recommendations and current market conditions.
Tried This Recipe? Leave Your Review!
There are no reviews yet. Be the first one to write one.